Scrapper@heart

Color my world with family, friends and some time to be creative making cards!


3 Comments

A Cup of Kindness

Hello, I am back today for week 4 over at the Coffee Loving Card Makers Blog. I am really enjoying my time as a guest with Amy and the Brew Crew.

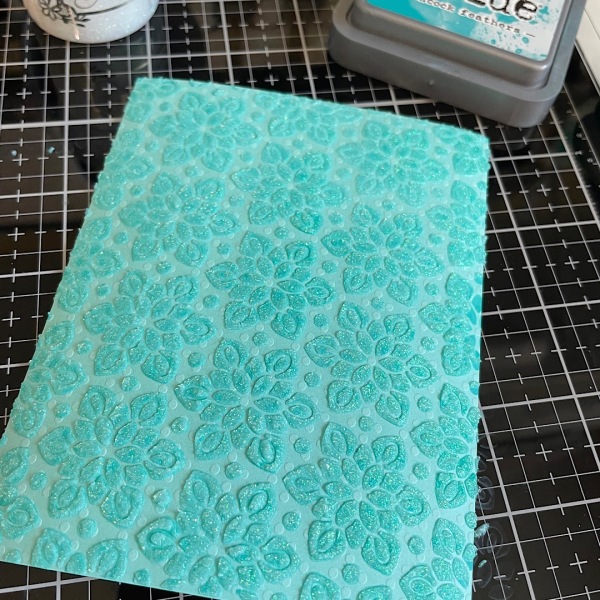
I first started off by taking my Miss Ink Stamps-Frosty Flakes Stencil and some Peacock Feathers Oxide ink and made my background on a piece of dotted light teal DSP. While the stencil was still in place I took my Nuvo Shimmer Paste (which I adore) and made the snowflakes come to life. You can see below, and it turned out really nice. Check out all that sparkle!
Next, it was time to assemble my coffee cup. I have used Catherine Pooler’s Coffee Cup Gift Card To Go Die-Cut. This is a really great die! As my card was developing, I decided the cup was a bit too tall and was hiding too much of my beautiful sparkly snowflake background, so I cut it down about 1/2 inch or so. I think it worked out perfectly and it doesn’t look too squatty! I am not going to have it open to reveal a GC this time, but have used it that way many times in the past. However, this time I plan to make this a Christmas card instead.

The sentiment on my card is one I have had for eons and it was just waiting to be used. It is from Verve and is in fact digital. I took some Clear Nuvo drops and glitter to my three punched hearts. My snowflakes were cut out of two different kinds of silver paper using a Martha Stewart punch. The outside of the snowflake is mirrored paper and then I just found a circle punch that was the right size for the center and for that, I used a bit of sparkle glitter paper. The fun snowflake DSP wrapping around my cup is from Stampin Up.

Card Elements Recap: Catherine Pooler Gift Card to Go Die, Verve Digital Sentiment, Stampin Up-DSP, Martha Stewart-Snowflake punch, Peacock Feathers Oxide Ink, Nuvo Glimmer Paste, small heart and circle punch.

I certainly hope you have a wonderful day and I will see you next time! Happy Crafting! Nanc’


4 Comments

Birthday Messages

Hello, I hope you’re having a good day today! I am back with a Birthday card using some fun pieces from the Stampendous Hugs Collection from Spellbinders.

I paired my little note packages that come in the Hugs Accessories set with Spellbinder’s red-foiled Geometric Optical Background. This is the first time foiling in red and I really like how it turned out. I cut my note packages/gift boxes out of red foil paper that matched perfectly. The white bow comes in the Accessories set as well. I put a tiny gold heart in the center of each package and a heart in the corner to tie it all together. I just love this Stampendous Hugs Sentiment set so much and I know it will be getting lots of use in the future as well. I did use double-sided tape to get my packages to adhere to the card base.

This card has a lot of dimension, so it would need to be delivered in person or a special envelope. I am also linking up over at Addicted to Stamps and More for their monthly Birthday Challenge.

If you place an order after clicking on one the links below I will receive a very small commission, and also get to continue as an affiliate with Spellbinders at no cost to you. I certainly appreciate your support!

Card Details: with Affiliate Links

Stampendous Bear Hugs

Stampendous Hugs Acc.

Stampendous Hugs Sentiments

Geometric Optical Background

Glimmer Hot Foil System

Glimmer Hot Foil Variety Pack

Spellbinders 6

Bearly Art Glue

Thanks for coming by! Nanc’


3 Comments

You Can’t Wrap Love in a Box…

Hello, As I mentioned in previous posts, I have made quite a few cards using this great Stampendous Hugs Collection from Spellbinders. Here is card number 3! Today, Mrs. Bear is giving ALL of you a great Big Hug-from me. I certainly appreciate each and every one of you that visit me here and leave me such wonderful comments. It certainly warms my heart. This hobby and the people in it have brought me so much joy and for that I will forever be grateful.

I am really enjoying the Hugs Sentiment stamps as much as the Bear dies themselves, they have a load of wonderful sayings. This time I decided to give Mrs. Bear a sign to hold, as I wanted both sentiments to be on the front of the card.

Card Details: with Affiliate Links

Stampendous Bear Hugs

Stampendous Hugs Acc.

Stampendous Hugs Sentiments

Spellbinders 6

Bearly Art Glue

Foam Squares

I hope you have a wonderful day and find some time to be creative too. Nanc’


14 Comments

Rawr…Is Hello in Monster

Rawr…It’s the middle of the month and time for our next Hues of Colors at Color Hues. I am a bit jet lagged as I just returned from a ten-day trip in California and Hawaii, so I am going to get right to it!

Julie B is our wonderful hostess and I absolutely enjoyed working with her color combo. Thanks, Julie! I decided it had been a while since I made a scene with my MFT dies, so that is what I did. When I first started putting this card together, I had no intention of my house being occupied by a cute little monster, but I love how it turned out.

I am going to add my card over at Happy Little Stampers-Anything Goes with Dies Challenge.

Card Details: MFT- 4 sets; Picture Window, Fundamental Furnishings, Take a Seat, and Potted Plants. The monster is from Your Next Stamp and so is the sentiment. I used a bit of Copics and Prismas to color the monster and made a soft cloud sky behind my window using MFT’s cloud stencil.

Now, I certainly hope you will head on over to Color Hues and check out what my fabulous teammates and guest Joanne James have done with these hues of colors, and then play along. I was certainly inspired by all of their creations.

Take care, Nanc’


4 Comments

Gold and Black

Hello, I am back today with one more card using one of Spellbinder’s newest releases in the Four Petals Collection. I just love the quick and wonderful results you get when foiling this Scroll Label Plate, and think it looks great in gold on a black background, don’t you? I needed to send a card to a friend and thought why not add a few flowers to it. These dainty flowers are also from Spellbinders. I have everything I used linked below. The white confetti background is actually a piece of DSP that I think worked out perfectly.

Card Details: with Affiliate Inks

Four Petals Collection

Scroll Label Hot Foil Plate

Sealed Wildflowers

Spellbinders 6

Glimmer Hot Foil System

Glimmer Hot Foil Pack

I am happy you stopped by. I hope you have a wonderful day and find some time to be creative! Nanc’


3 Comments

Happy Easter -Waffle Flowers

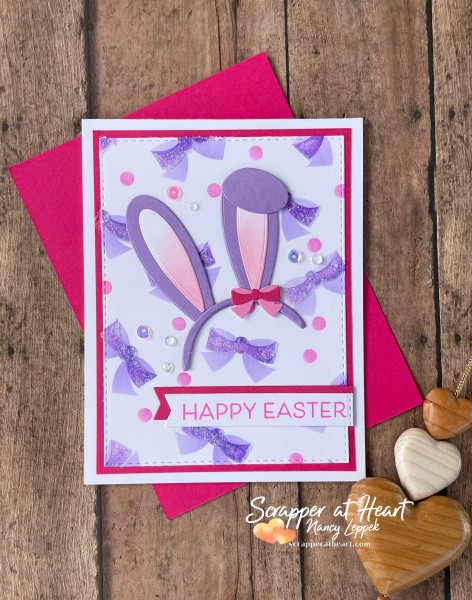
Hello, Are you ready for all things Spring? I certainly am! Not that we have had a bad winter, as we certainly have not. I am just ready for Spring because the pastel colors, bunnies, and flowers just make me happy.

Today, I am tickled to share with you my latest crush. Waffleflower had a Blog Hop giveaway last month, and I was so very fortunate to have been on the receiving end of one of their Newest Kit. The inspiration during the Hop was incredible. My name was selected from Carol H’s blog. If you don’t follow Carol’s BLOG and or IG ACCOUNT, I highly recommend it. I love everything she does!!

Enclosed in my kit, was this darling Bunny Ears Die and Layered Bow Stencils. Unfortunately, I am sorry to say, the die set is currently out of stock, which is no surprise to me, but the bow stencil is still in stock. Hopefully, they will get the ears back in stock soon, if you are interested.

In between all the noise and dust of our bathroom remodel, I had a great time putting all these cards together.

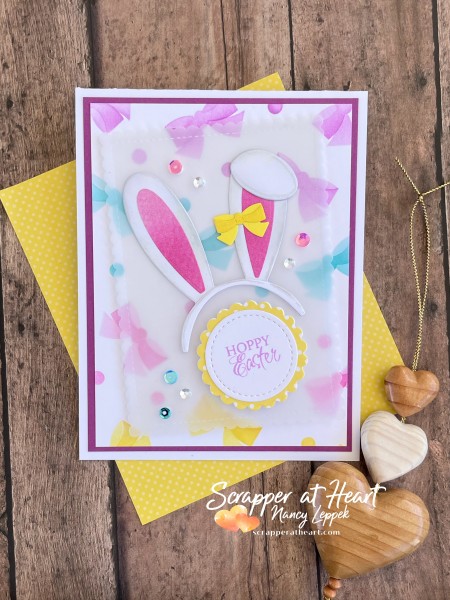
Card Details: Waffle Flowers- Bunny Ears Die and Bow Stencil. The sentiments are either old; Papertry Ink or Verve. I tried to make the second card a boy bunny and used a different bow to look like a bow tie, from Paper Smooches. The Postal die is from Hero Arts. The stitched circles are from SU, scalloped circles are from Sizzix. For card number one, I used some Nuvo Glimmer paste to add sparkle to my bows.

I just realized that on my last card, I got a bit of yellow ink on my bows. Grr!

I am linking up with Darnell over at NBUS as this set is new to me.

Thanks for Hopping by and I hope you have a very creative day! Nanc’


11 Comments

Happy Birthday

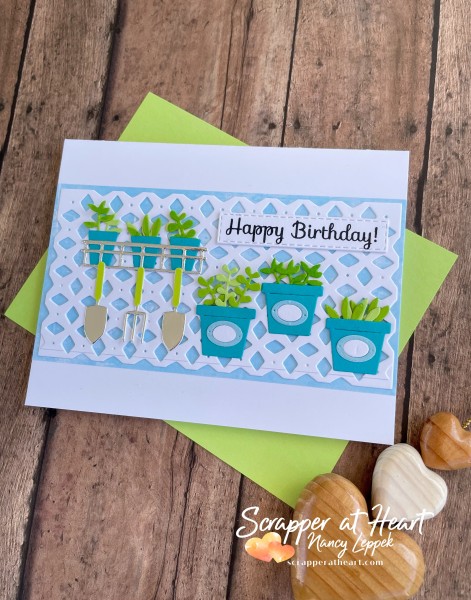
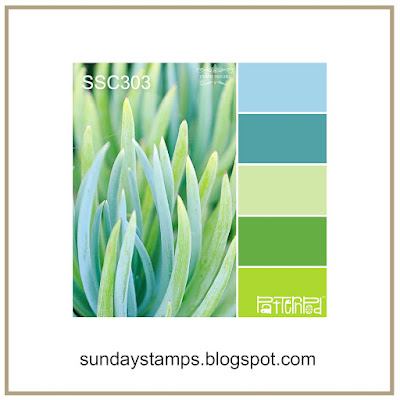
Hello, It is Monday and I am back with a card I made with two challenges in mind. The first is the pretty Spring Colors over at Sunday Stamps. I fell in love with their graphic as soon as I saw it plus all the cards by the DT and in particular- Stef Perrys. I incorporated every color from the graphic on my card.

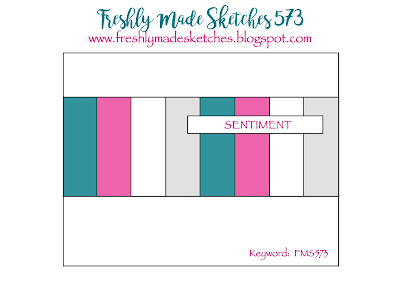
I decided to pair it with a Sketch, and that sent me right away over to Freshly Made Sketches. I took some creative liberties with this Sketch and hope that you can see my correlation with my garden pots and tools and the vertical stripes.

Card Details: This die set is called Garden Shed and is from Sizzix. The lattice in the background is from Whimsy Stamps and I cut it down and pieced it back together so the edges were the same. You can see a definite line at the bottom but that is okay. I used mirrored paper for my garden tools and plant basket/shelf. The greeting is from Your Next Stamp.

You will be seeing this set again that is for sure.

I hope you have a wonderful day and week ahead and find some time to be creative, Nanc’


19 Comments

Sending Love

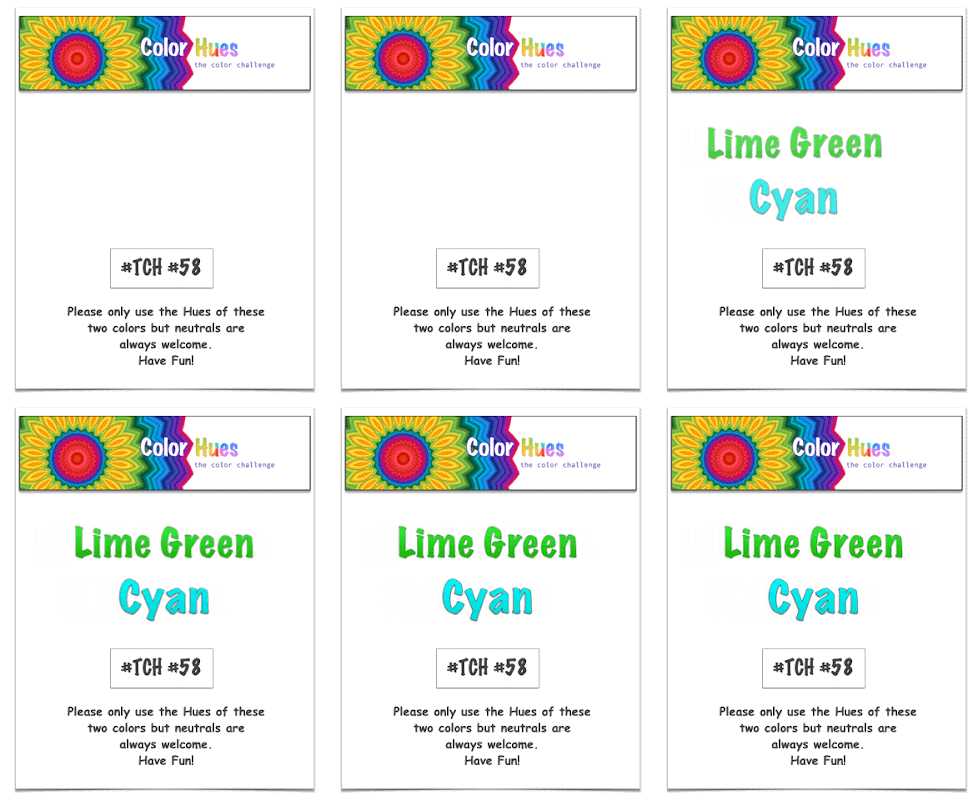
Hello, We have the prettiest Color Pairing starting today at Color Hues. Tracey is our wonderful hostess and I am smitten with her color combo. The Design Team and our guest have some truly amazing cards over on the blog, you must check them out.

We are still in the middle of a new release over at Spellbinders, so when I saw this challenge coming up at Color Hues I knew this new die cut was going to work out wonderfully. The Collection is called Four Petal and this specific die that I have used above is called the Four Petal Bloom Reflection. It is so very pretty and easy to put together. I have used the same Thanks Enclosed Sentiments as well. I have all the links below if you want to check them out.

Card Details: with Affiliate Inks

Four Petals Collection

Four Petal Bloom Reflection

Thanks Enclosed Sentiments

Spellbinders 6

I had such a good time putting this card together. Now, head on over to Color Hues and check out my talented team and our guest’s cards. We have my friend/teammate from STB- Linda Snodgrass joining us as our guest. Welcome, Linda!

Happy crafting, Nanc’


4 Comments

Handmade with Love

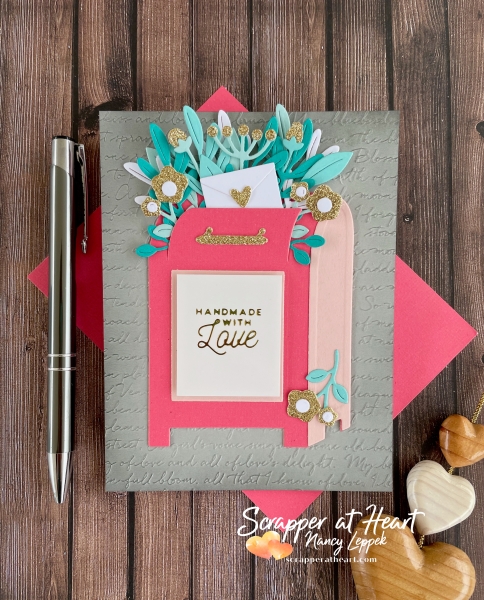
Hello, I am back today with a card using the fabulous Parcel and Post set from Spellbinders. I purchased this die set about a month ago and was itching to pull it out. Yesterday, after spending the entire morning with my dad, I went in the studio and got lost in paper for a bit. Since I had all my Christmas cards completed, and I needed a Thank You card for a friend, I thought this set would work perfectly and it certainly did. I am already planning to use it again for a challenge in the New Year.

***Note– This Parcel and Post set along with the Sealed Glimmer sentiments and others are still on sale at Spellbinders. The Script EF that I used for my background is from Stampin Up. I inked the edges with Black Soot Oxide ink for some added interest.

Affiliate Links Below:

Sealed Glimmer Sentiments

Parcel and Post Mailbox Dies

Spellbinders 6

Glimmer Hot Foil System

I will be linking up with the team over at Happy Little Stampers, Anything Goes with Dies.

Thanks for stopping by, your comments always brighten my day! Take care, Nanc’


10 Comments

Hi there, Friend

Hello, It’s the first of November and I am going to tell you that I am in denial, how about you? Do you think if we stomp our feet and do not budge that Christmas won’t come? Me either! Why are things so much harder than they used to be and why are we or should I say me, not anxious about the Holiday Season? Inquiring minds want to know!

Okay, I got a bit sidetracked. Today over at Color Hues, Hannelie is our wonderful hostess and she picked a pretty color pairing that I totally was enamored with.

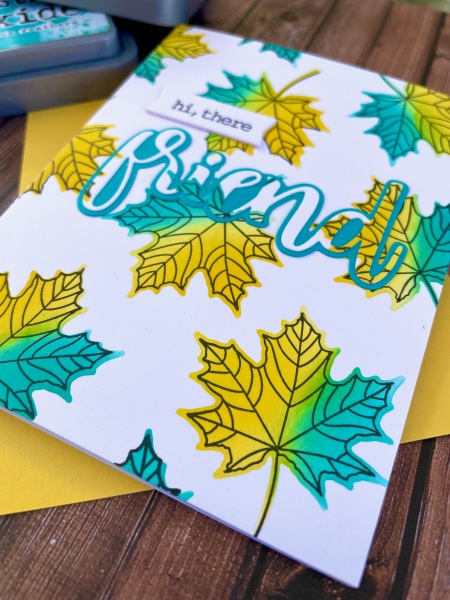
Here is a close-up of my card. I just love doing this technique with the leaves every year. I love the look of it.

Card Details: The first thing I did was make a stencil using the die that goes with these awesome leaves. Next, I sponged them one at a time in Mustard Seed and Peacock Feathers – Oxide Ink. I did this as carefully as I could in hopes to not turn them a shade of green. Then I came back with the matching stamp in black to give them their definition. Finally, I decided to do the inlay technique with the friend die and later bordered it with teal paper. The hi there was added last using a tag die that has been layered 3 times for depth.

Supplies: Retired SU leaves from the Colorful Seasons set. The friend die is from Honey Bee Stamps, and the hi there is from Ellen Hutson and die cut with Pink and Main tags.

Now, if you come on over to Color Hues you will totally be inspired by the fabulous team’s cards along with our wonderful guest-Arlene.

Take care, Nanc’